Google Chrome is one of the most popular web browsers among computers and mobile devices. Despite its popularity, we can’t deny that Google’s web browser is well known for eating a good portion of your RAM memory due to its navigation handling. With regular use, some users often encounter the “Out of Memory” issue, which means Google Chrome has been left without enough memory to handle processes. Sometimes it’s the browser eating the memory until it becomes unable to go forward.
How to avoid the “Out of Memory” issue on Google Chrome
Through this article, we will teach you some of the steps (via) that can be taken to avoid this problem. Below you see some tips to tweak Google Chrome and prevent this error from emerging
Close the Unused Tabs in Chrome
A few years ago, one user wouldn’t leave many tabs opened on a web browser. After all, most PCs would not be able to handle this. As technology evolved, it’s pretty much possible to leave a lot of websites open without major issues… However, it doesn’t mean, Google Chrome can easily eat all resources if you leave a lot of tabs open. Therefore, a useful tip to avoid the Out of Memory issue is to close the tabs you’re not using. If you’ve opened a website to check and will not use it anymore, then close the tab instead of leaving it running in the background. This will lighten the load on your browser. On Google Chrome, to close the tab you can simply click on the “X” next to the tab’s title.
Restart Google Chrome
If you frequently experience Chrome’s ‘Out of Memory’ issue, you can try closing and reopening the browser. That will close all the features and turn them back. There is a quick shortcut to perform this. Simply type in the address bar on the address bar:
chrome://restart
This will automatically close Google Chrome and restart it.
Force Close Google Chrome
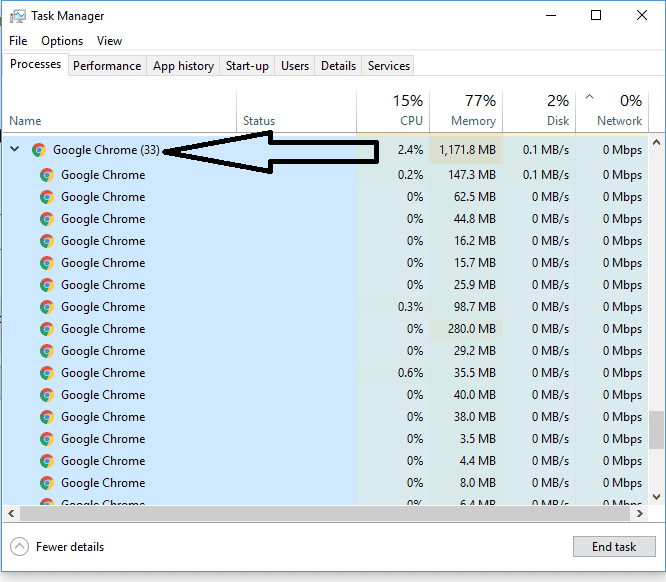
If the error happened and you’re stuck with a hang on the browser, you can try to force closing it. This will kill the process running on the computer, triggering a complete restart. To perform this process, open the Windows Task Manager. You can access it by performing the usual Ctrl + Alt + Del key combination or by right-clicking on the Start Button icon to find the Task Manager.

- Open Task Manager
- Access the Processes Tab in Task Manager
- Right-Click Google Chrome on the list and choose End Task.
- Relaunch Google Chrome
Keep your Google Chrome App updated
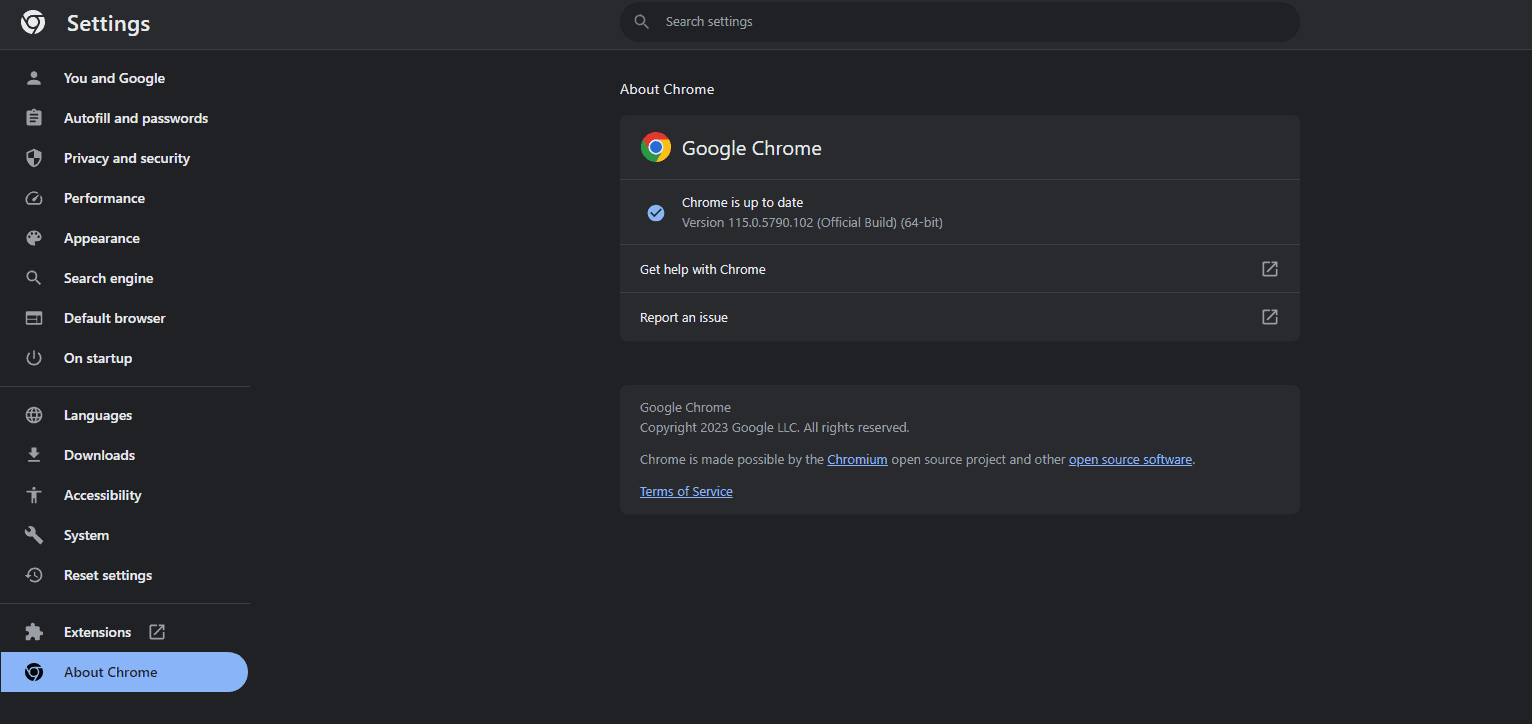
Every update brings improvements for Google Chrome, so you need to make sure to keep the app updated in order to get an optimal experience. So, try to always update your Google Chrome Browser to solve all the potential issues.

- Launch Google Chrome, select the three dots in the top-right corner, and choose Help >> About Google Chrome.
- Chrome will search for the available updates
- Let Chrome Install the available updates.
- Select Relaunch to apply all the updates.
Turn Off Browser Extensions to Fix Google Chrome Ran out of Memory
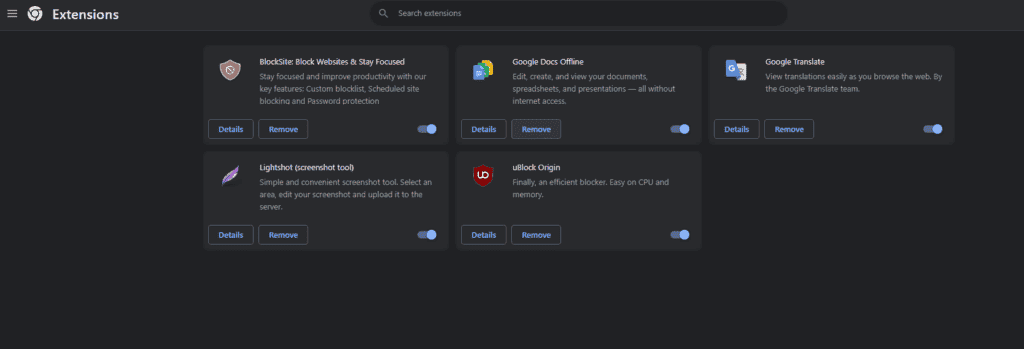
Nowadays part of the web navigation involves the use of Extension. There are many extensions available, and the list is massive when it comes to Google Chrome. From Theming Engines to Content Filters there are many available on Chrome Store. While they are cool and useful, they will make Chrome eat more of your resources. So when the browser starts running out of memory, it may be a good idea to reconsider the use of certain extensions.

Thankfully, Chrome allows you to simply disable an extension rather than uninstall it. So you can check if there is an extension eating your memory by disabling it. You can reactivate the installed extensions any time you want.
To disable extensions use the following tip:
- Launch Google Chrome, Enter the Follding in the Address bar and press Enter:
chrome://extensions/
- Turn Off the Toggles for all your extensions.
- Re-Launch Google Chrome.
Remove Potential Threats and Enhance Security
The out-of-memory error can also come from a virus or malware file running on your computer. In this case, it may be a good idea to enable enhanced security options on Google Chrome. With these options, the browser will be able to monitor websites and extensions to avoid you get infected by potential threats. Take in mind that the most advanced option requires you to send navigation data to Google.
- Select the Three Dots in Chrome’s Top-right corner and choose Settings
- Select Privacy and Security
- Go to Security
- From there you be able to find the best option to enable enhanced Security on Chrome.
Clear Browsing Data in Chrome
If you’ve been using Google Chrome for years and started to suffer from this issue recently, you may consider cleaning up your browser data. It keeps the sites you’ve visited in the past, your logins, and more. Sometimes the data will interfere with Chrome and will compromise the app’s performance. So you can clear the saved items to get extra performance.
Here is How To Clear the Saved Data:
- Open Google Chrome, Type the Following in the Adress Bar, and Press Enter:
chrome://settings/clearBrowserData
- Choose a time range from the Time range drop-down menu.
- Select the Items you’re willing to let go of.
- Choose Clear Data at the Bottom to begin wiping your browser history.
- Relaunch Chrome and see if the error comes up.
Reset Chrome to the Factory Settings
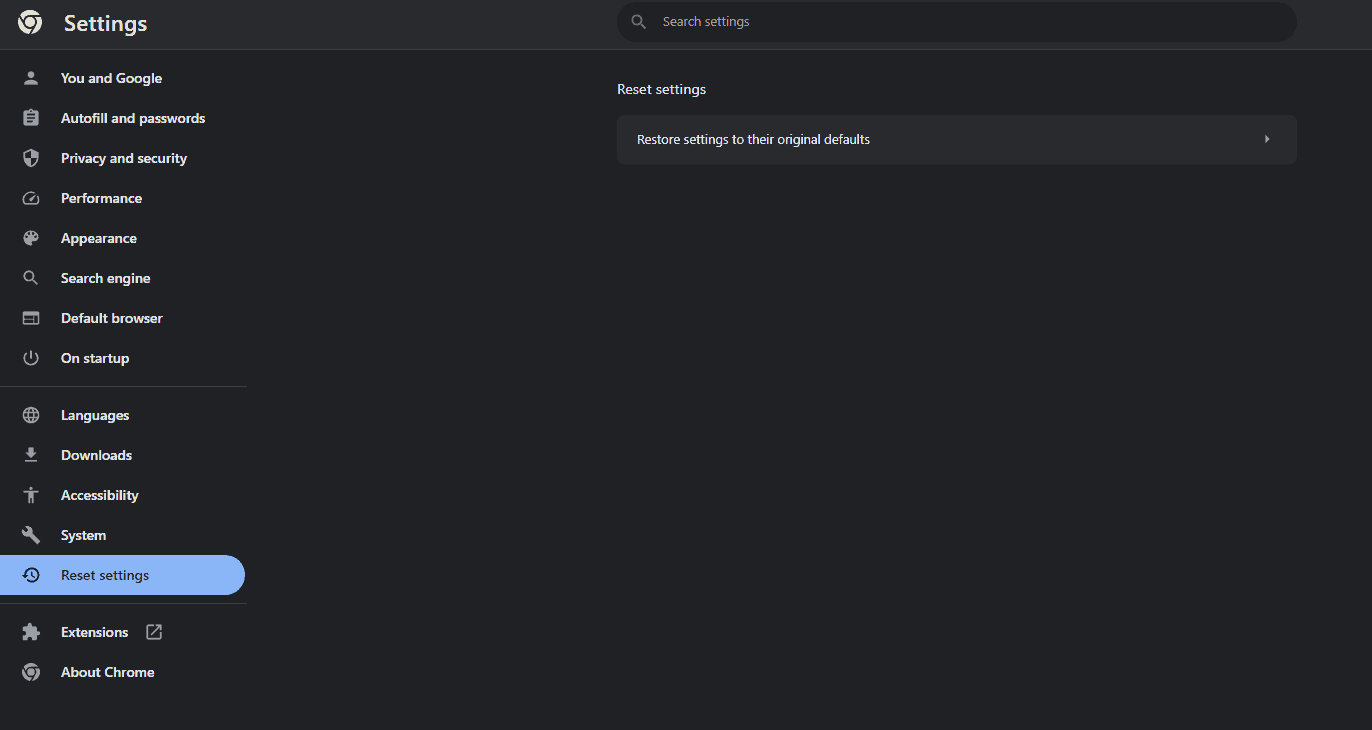
A more aggressive approach is to completely wipe Google Chrome and Start from Scratch with the Factory Reset option. It will roll back all changes, making you feel like you’ve just installed the browser on your PC.
- Open Google Chrome, Select the Three Dots in The Top-Right Corner and Choose Settings.
- Select Reset and Clean Up in the Left Sidebar.
- Choose Restore Settings To Their Original Defaults on the Right Panel.

- Select the Reset Settings Option.
Re-Install Google Chrome
The most drastic route you can take is completely removing Google Chrome from your PC to re-install it again. This will certainly erase all files that the browser saved before, but thanks to Google Sync you may be able to restore some of your preferences. This is a final method if none of the above tips fixed the Out of Memory issue.
Conclusion
The above tips are a good way to start if you’re trying to prevent the out-of-memory issue on Google Chrome. The web browser is known for being power-hungry, but with the above tips you may be able to get rid of the annoyances. Of Course, make sure your PC hardware is truly capable of running Chrome without issues.


